Let's Customize OpenDAX White Label Crypto Exchange Branding and Landing Page
Exploring The Exchange, Changing The Look And Feel
In the previous article, we discussed the problems that are faced when launching an exchange, and how OpenDAX and Yellow Network solve them together. We went as far as generating a Frontend using the OpenDAX NextJs template. Today’s article is about customizing that frontend and taking a closer look at the software.
Now this article assumes that you’ve been following along to our series. And while we recommend that you do so, feel free to follow along as we walk you through our exchange software. With that out of the way, let’s begin customizing our OpenDAX NextJs template and give it some personality.
Exploring Our Exchange
For better clarity, I’ve broken down our exchange’s trading interface into a set of components and labeled them with numbers. Think of them as lego pieces that you can join in different ways to create cool stuff.
Now If you’ve ever used an exchange, you will find this interface to be very familiar.
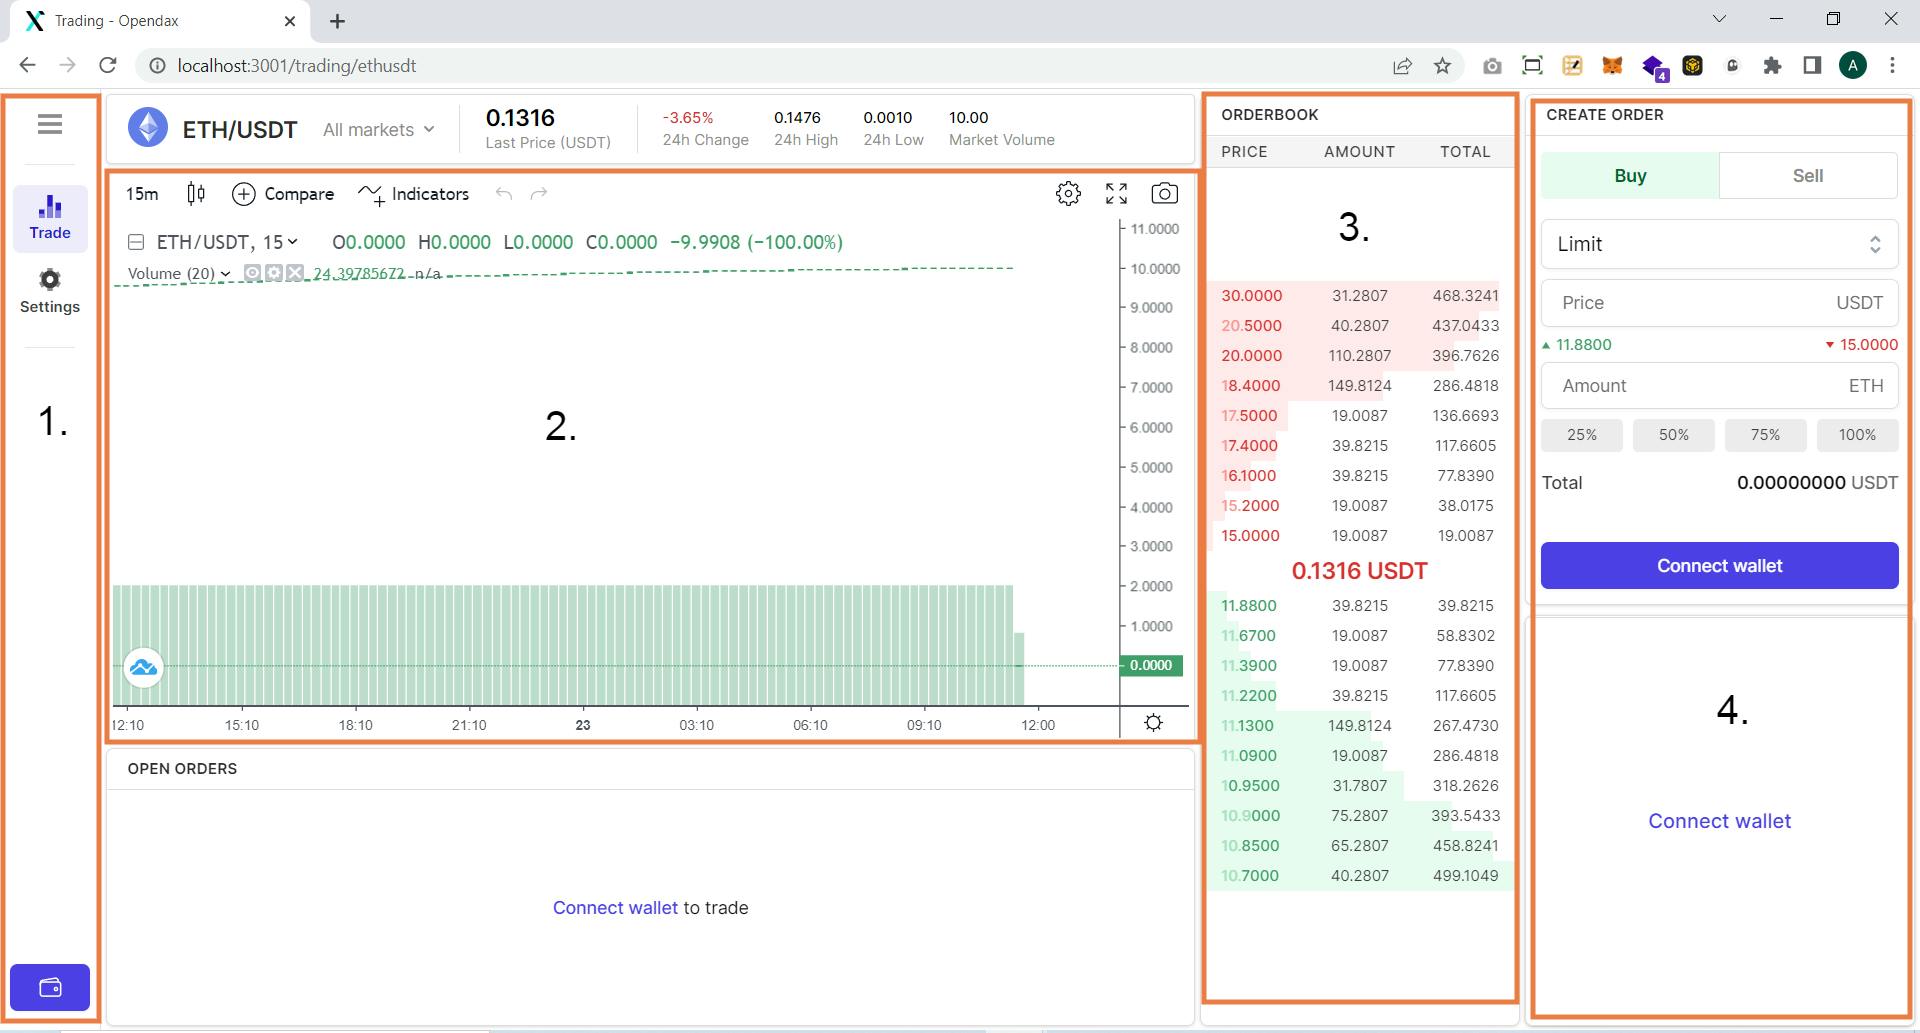
Sidebar
It has routes for our settings page, the trading interface and a button to connect our wallet. On connecting the wallet, you can also see added options for the order history as well as deposit and withdraw buttons.
While this component isn’t exactly essential to our exchange, it’s a convenient UI/UX design pattern. We can navigate to any screen from anywhere and this works even better on mobile as we’ll see later.
Chart
At the bottom of our screen, we have the trading chart. Our chart is the star of the show, OpenDAX makes use of Trading View’s charting library to provide you with all the good features of trading view without compromise.
By default, it supports all common chart patterns and indicators; tools like Fibonacci retracement and moving averages are built into it. You can also add your own indicators to this chart.
Orderbook
An exchange works by connecting buyers and sellers, and the Orderbook represents just that. In the orderbook, you can see all the buy and sell orders placed at different amounts for our currency.
For now though, those are all just mock orders that are populated through the mockserver.
Order Creation Panel
Lastly, we have the panel to create orders. Orders direct exchanges when and how to buy an asset for your account based on a given set of conditions.
Our exchange supports the market and limit orders, in both the buy and sell direction. Market orders execute at the market rate, and the limit orders execute when our currency value reaches the limit price.
Connecting The Wallet
To explore the UI even more, we need to connect our wallets. This will give us the options to deposit and withdraw Crypto to our wallet address and several other added features to our exchange.
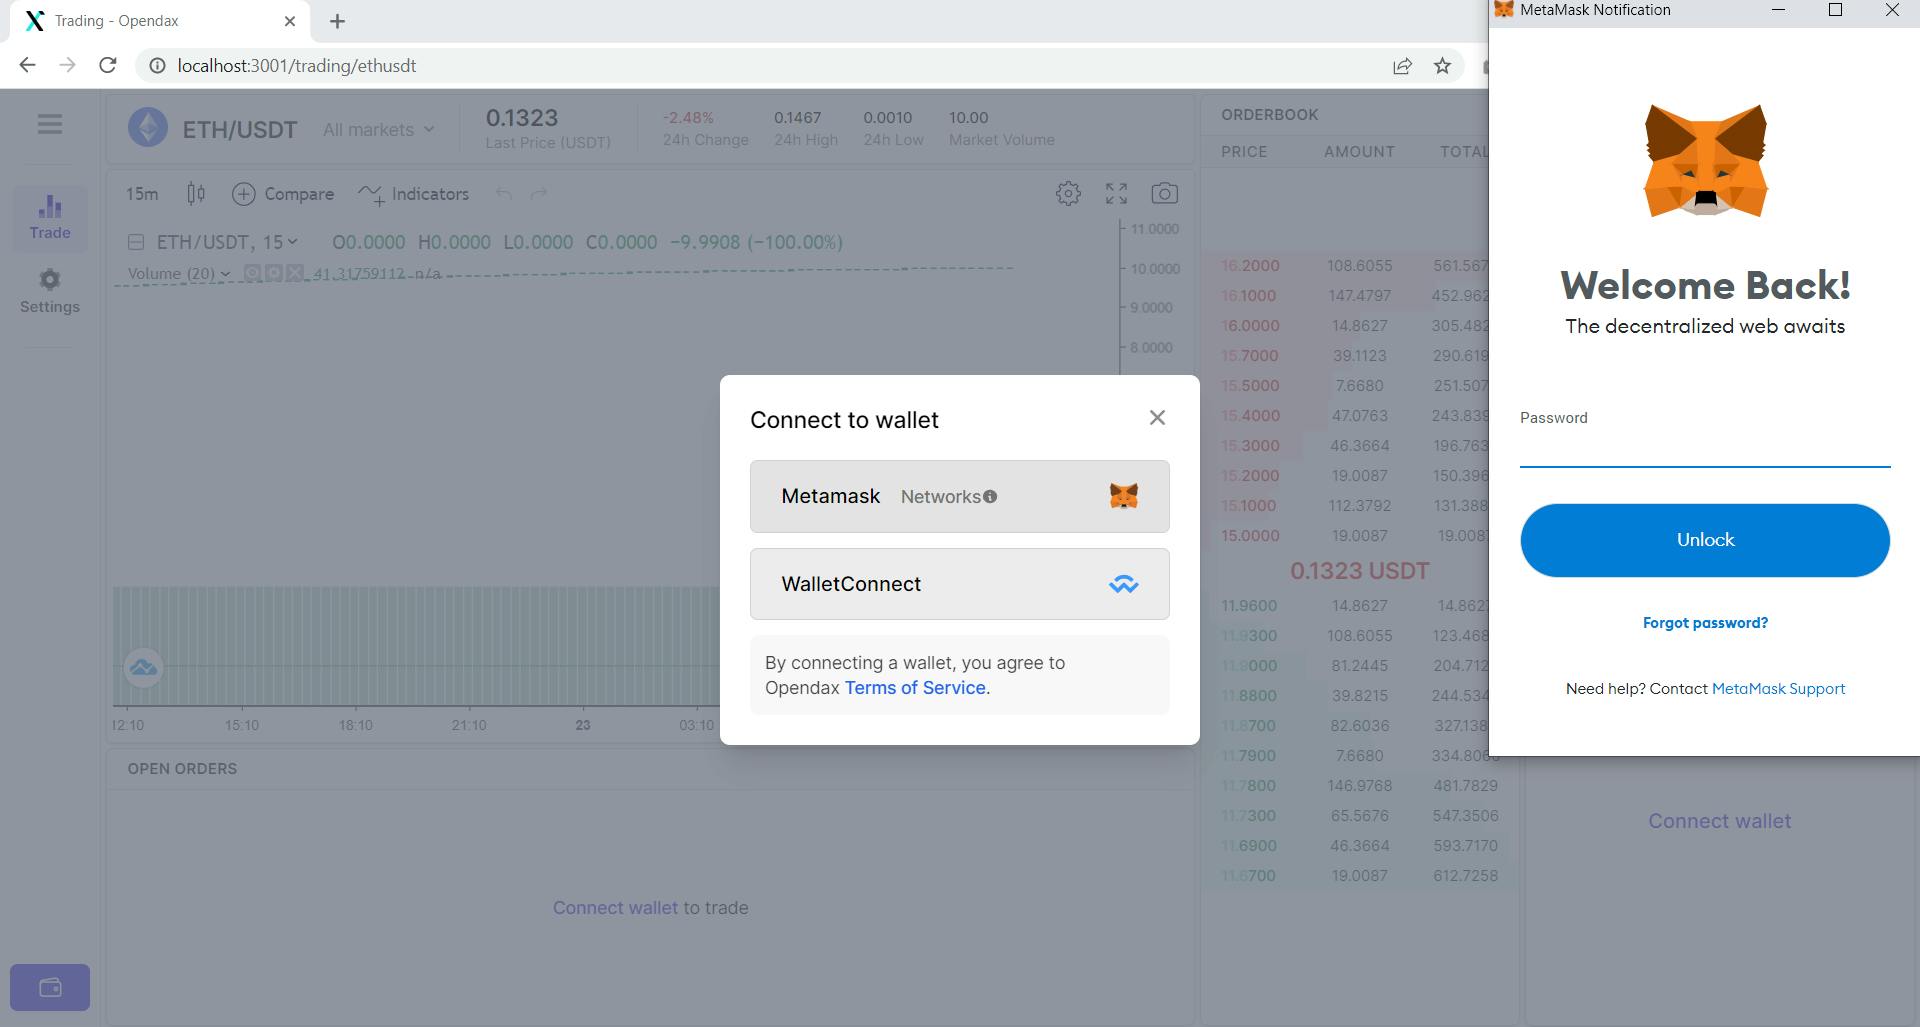
Since OpenDAX is a Decentralized Exchange, the wallet is non-custodial and to work with it you need to link your existing wallet to the exchange. As of now, it supports Metamask and WalletConnect.
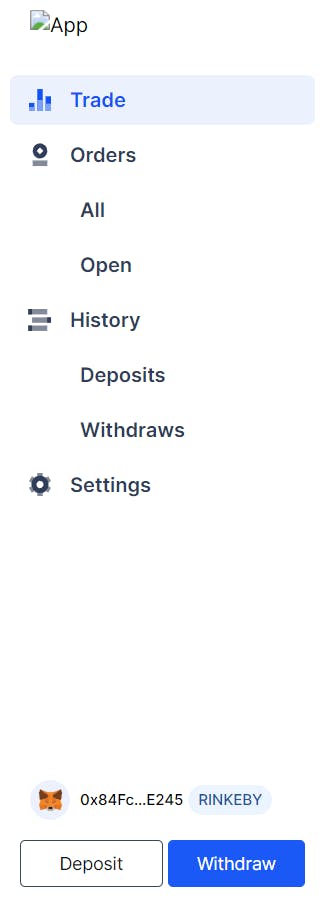
On expanding the sidebar, we can now see our wallet’s address as well as an option to deposit and withdraw crypto at the bottom. However, the placeholder for our logo currently sits blank as we haven’t chosen any logo yet.
It’s time to change that, so let’s head over to our exchange’s settings panel to see all the available customization options.
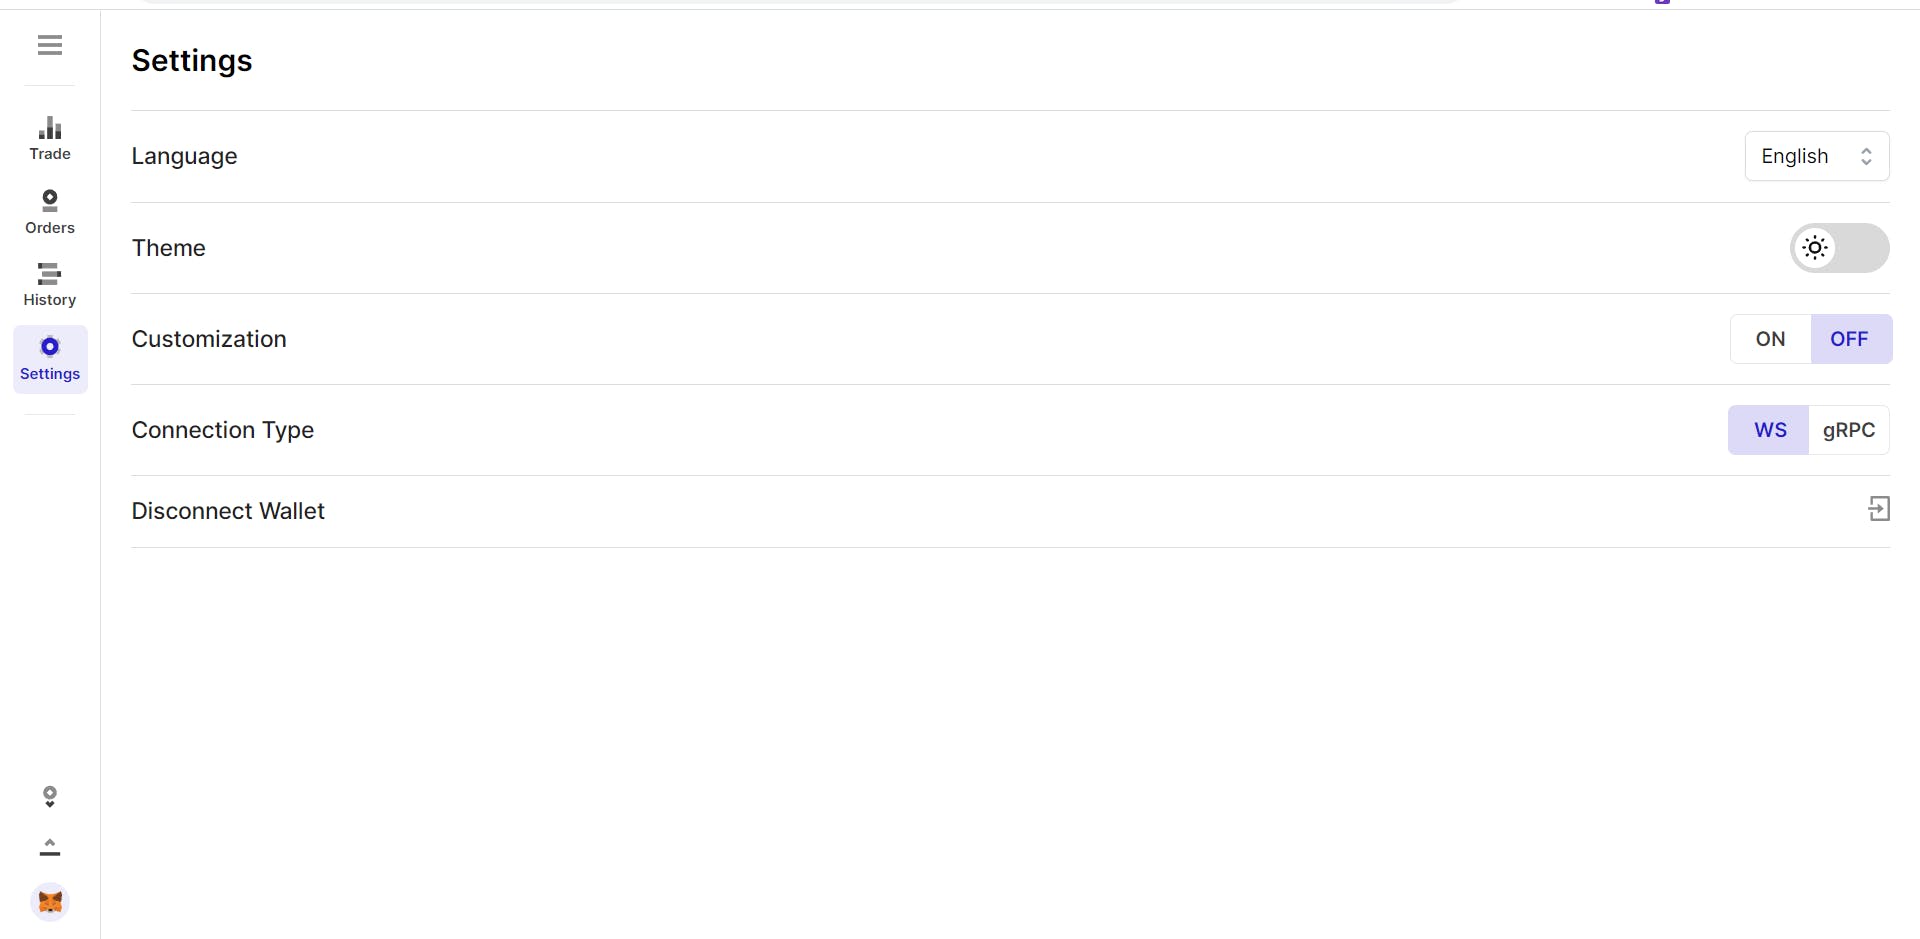
Here, we have an option to choose our exchange’s languages, currently it supports English and Russian–both of which can be toggled at the settings. We also have an option to toggle dark and light themes followed by customization and the connection type.
We’ll leave the connection type as it is, and enable customization for our exchange. Now this is where the fun begins, after enabling customization you can see an icon in the shape of a color tray at the bottom-right portion of your screen; this is the menu which will help us in customizing our exchange.
Customizing Our Exchange
Currently, our exchange looks quite bland and only has light and dark themes. It also lacks a logo and landing page, all of which are essential to any exchange. On clicking the color tray you can now see the different options to customize your exchange.
Playing With The Color Palette
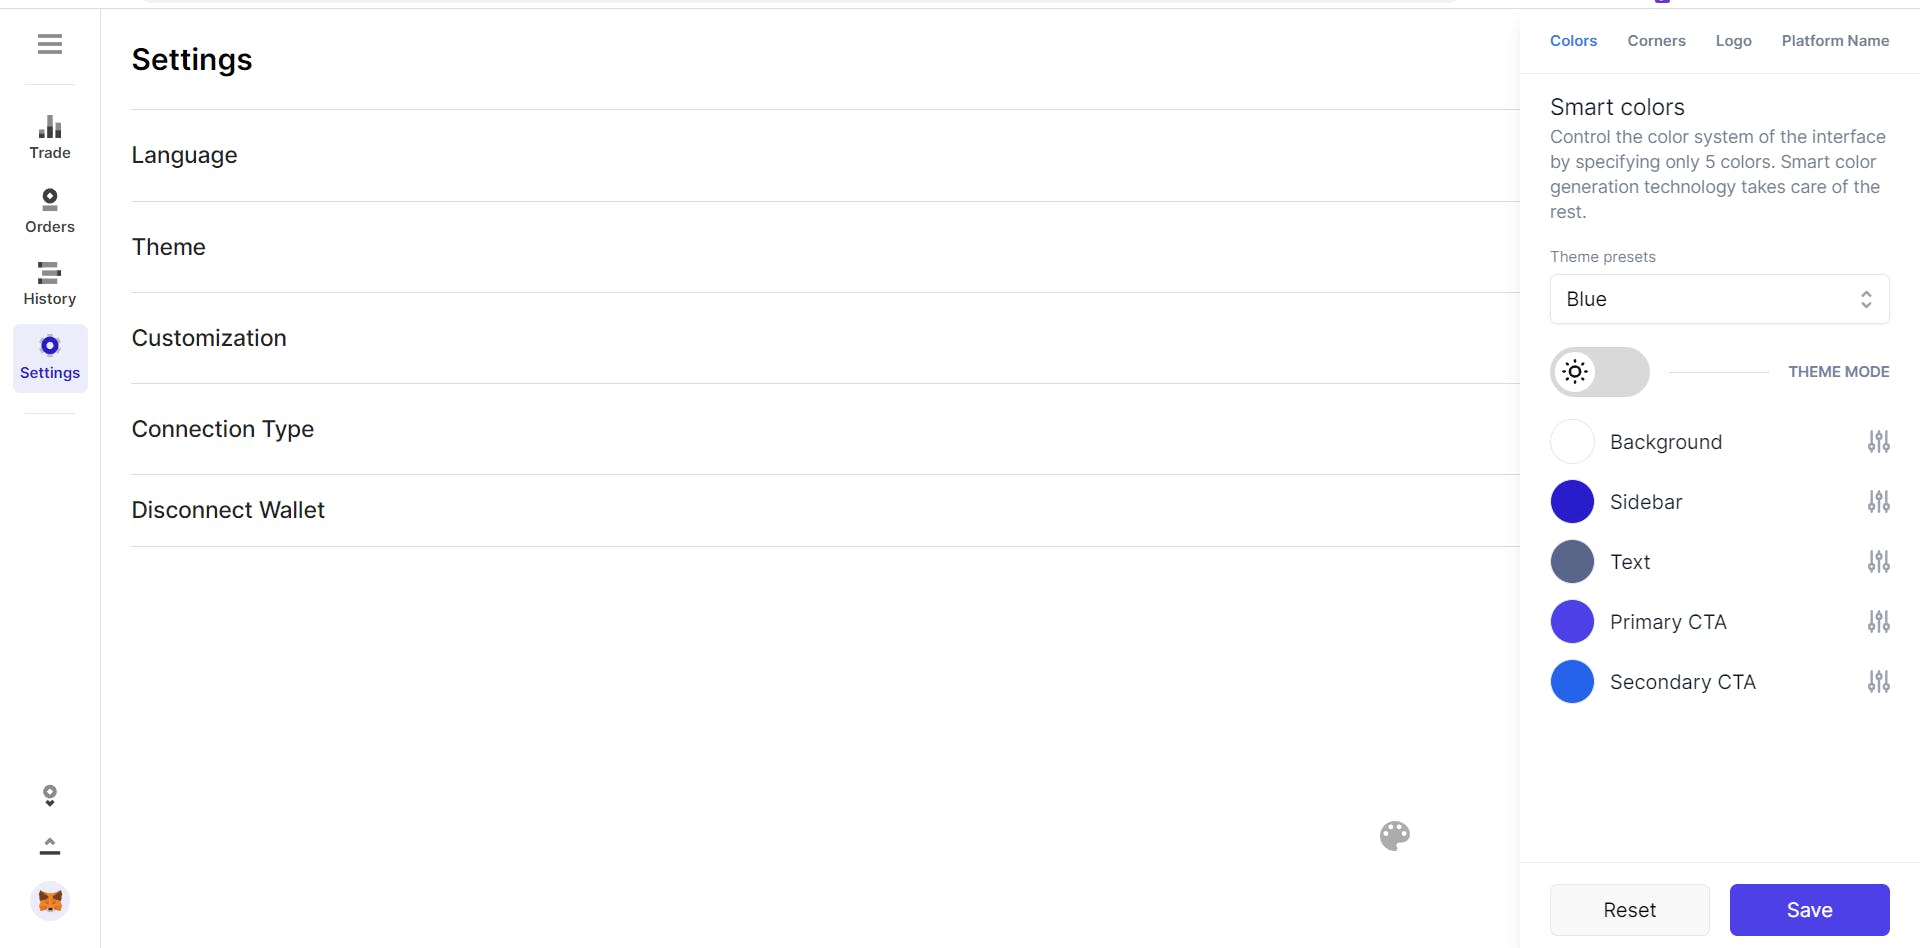
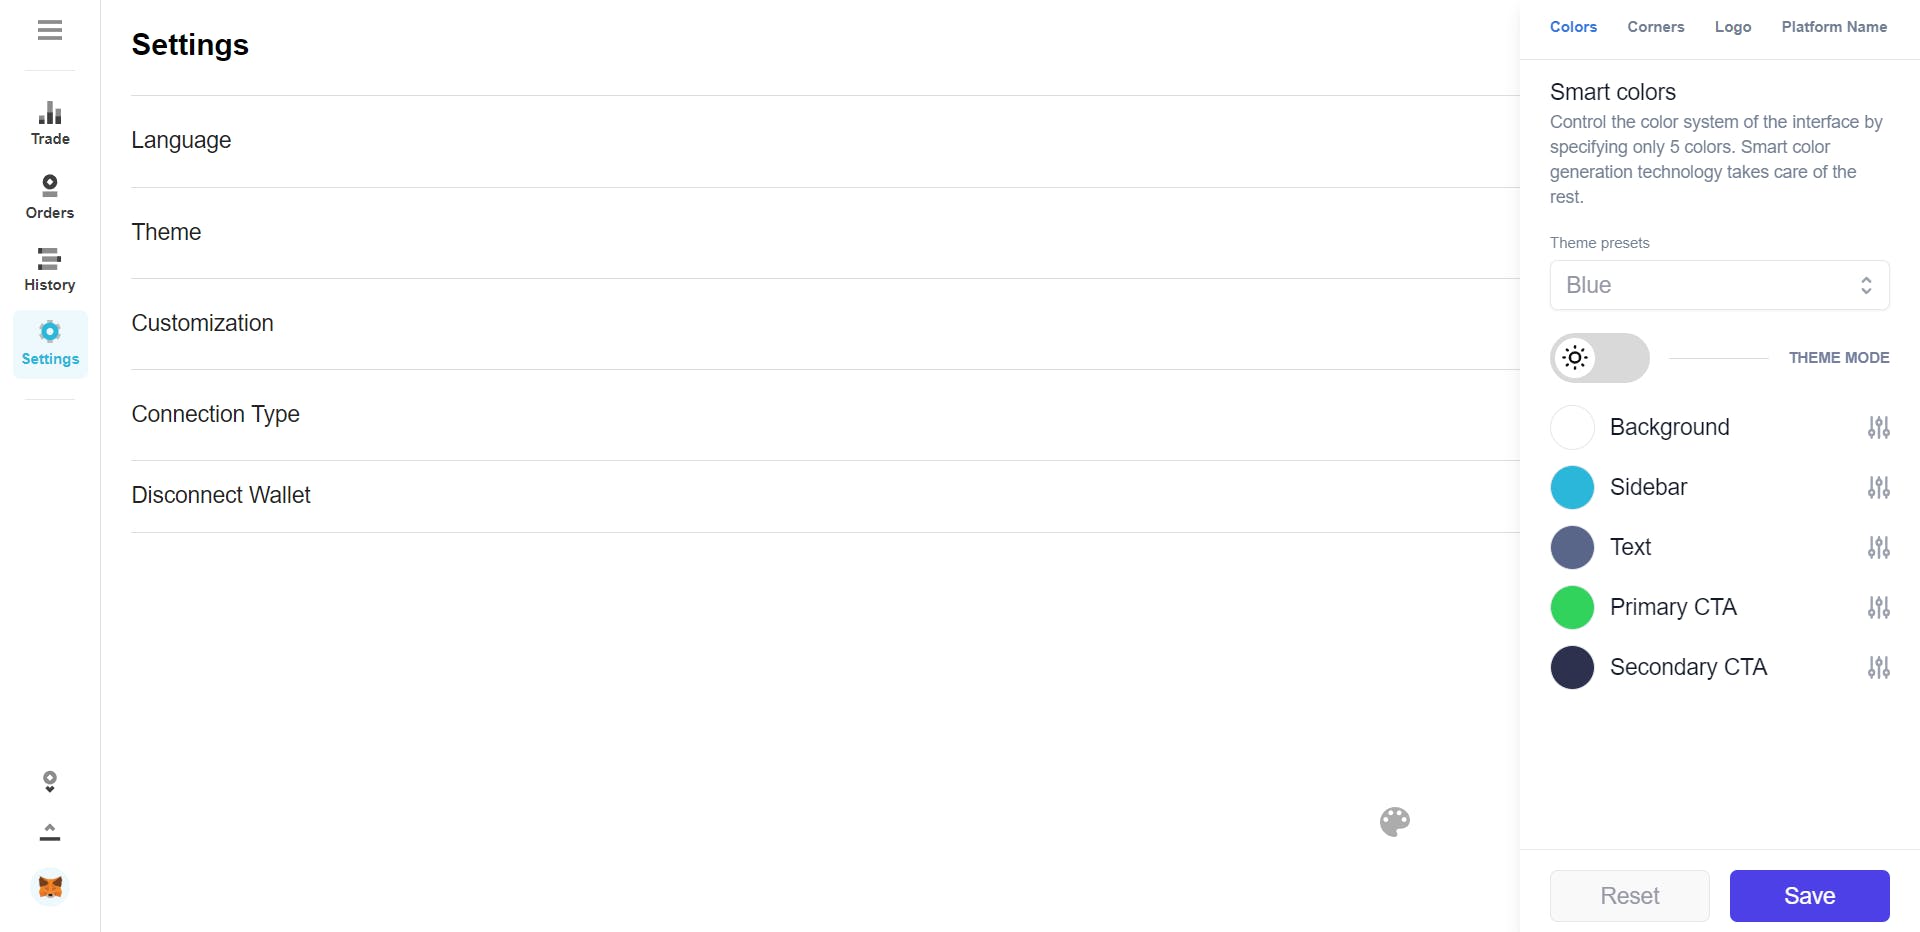
Let’s begin by changing the colors of our exchange. We’ll set the primary CTA, secondary CTA and Sidebar to #31d35c, #2d314d and #2bb7da hex codes respectively. These are the colors that I’ll be using for our landing page and the logo.
Adding A Logo
To add a logo, head over to the logo tab in the customization menu and select a logo for the light and dark modes for your exchange. For now, let’s just select a logo for the light mode, make sure your logo is 115x30 pixels in size.
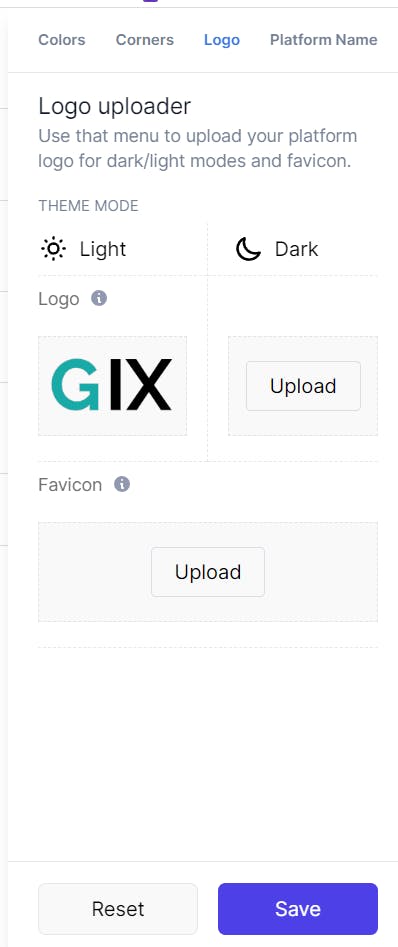
After uploading your logo, hit save, and now we have a logo, which you can see in the sidebar.
Naming Our Exchange
It’s finally time to name our exchange, let’s head over to the ‘Platform Name’ tab and set up our exchange’s name.
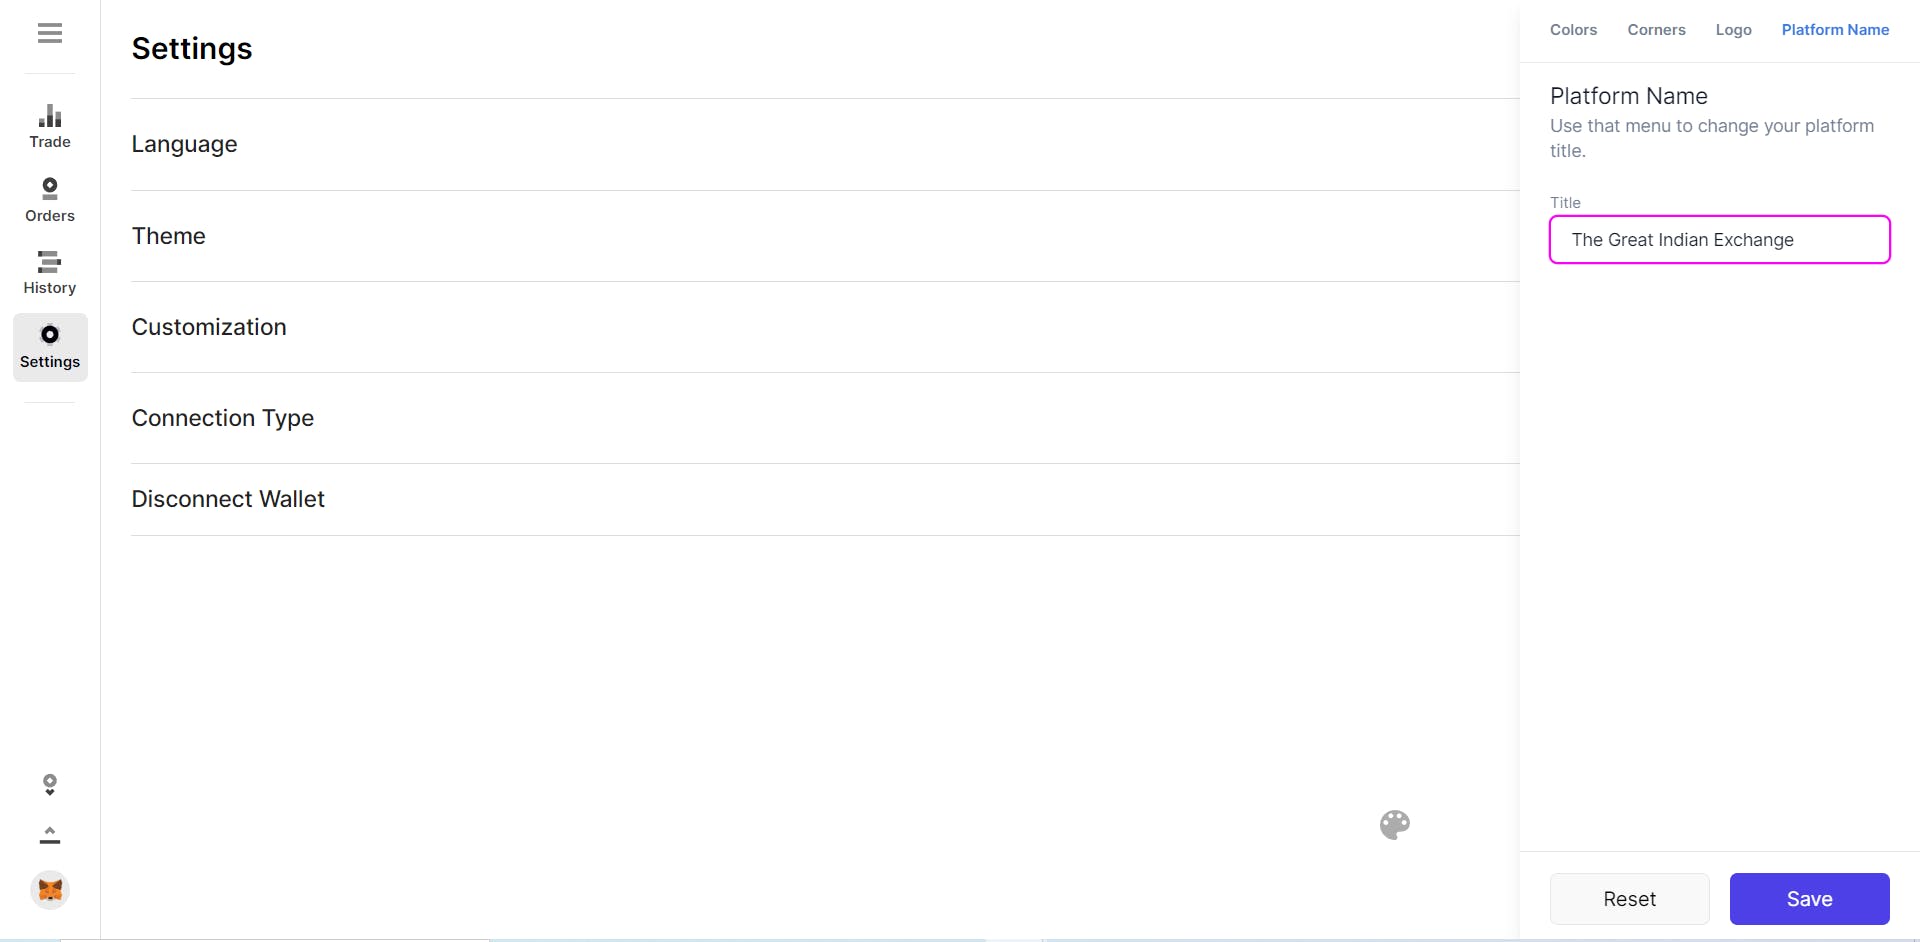
And there we have it, with this we’ve finished the basic customization for our exchange. It now has a theme, a logo and a name. But our exchange still lacks a landing page, which takes us to our last and final part.
Setting Up The Landing Page
Our app, by default, redirects to the trading screen and that’s because it lacks a landing page. The developers at OpenWare have given us full freedom in choosing our own theme and design with control over every visual aspect of our exchange.
However, to set up our landing page we need to get our hands dirty with a little coding. It’s time to pop-open the hood and configure our landing page internally. To make it easier, I’ve provided the code snippets which you can directly copy and paste into your exchange’s folder to make it look the same.
The first step is cloning, or downloading the code from my repository. After unpacking contents of the zip file, you can see we now have the following folders.
 After unpacking the zip file, copy index.tsx present in our pages folder, and replace it with the index.tsx file in our exchange’s pages folder. Next, we need to copy all the images present in our images folder, and paste them into the images folder located in public/images of our exchange’s directory.
The last thing we need to do is to copy the Landing folder and paste it in the components folder of our exchange. Remember to save all the files after every change and wait for NextJs to compile the files. After they are compiled, we can goto localhost:3001 to check out our exchange’s landing page.
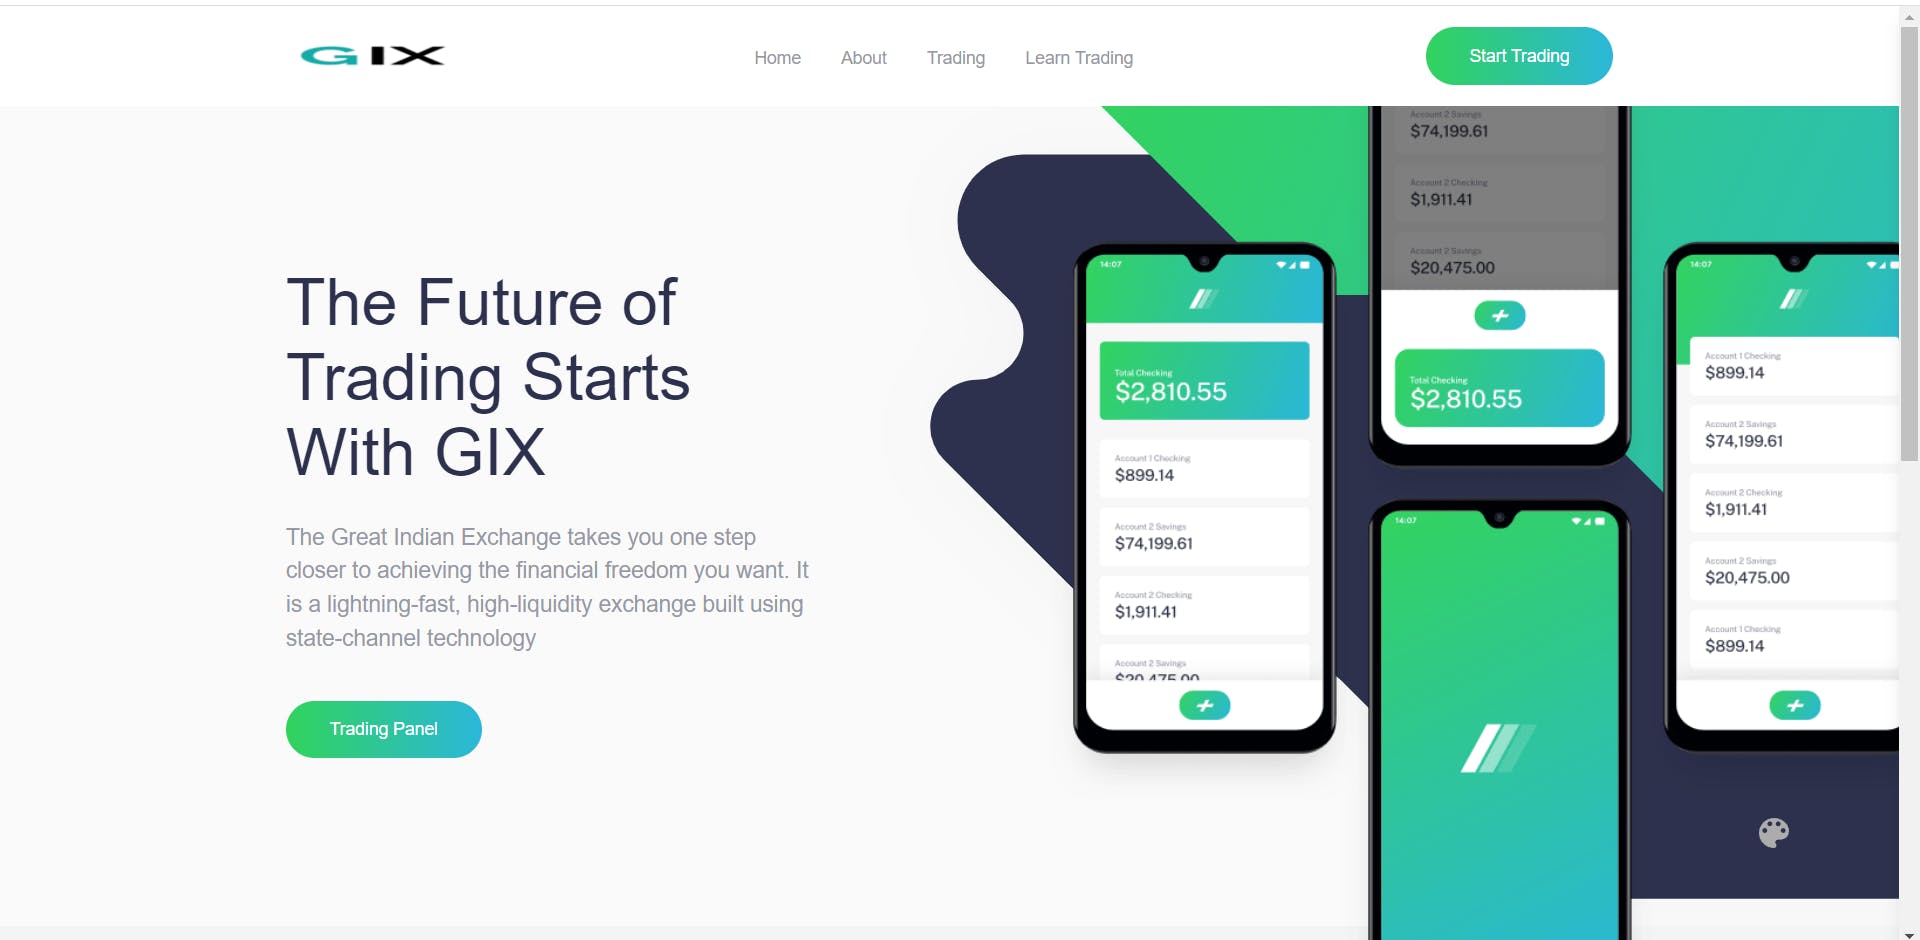
And there it is, the landing page complete with our logo and the buttons to access our trading panel; you can now click on the different buttons to access all parts of our website.
Conclusion
We are done with both the setup and customization of our exchange, it is now time to finally connect our frontend to the real OpenDAX backend with liquidity from the Yellow network. This is where we’ll deploy our exchange which you can use to perform real trades.
We’ll also go through our exchange’s source code to see how NextJs works in the background, and understand all the magic that happened in setting up our landing page. See you in the next article where we’ll plug the liquidity from the Yellow Network. And as always, if you have any doubts, feel free to reach out.
Learn Web3 & Dive into DeFi with Yellow Network!
Yellow powered by Openware is developing an unprecedented worldwide cross-chain P2P liquidity aggregator Yellow Network, designed to unite the crypto industry and provide global remittance services actually helpful to people.
Are you a crypto developer? Check out the OpenDAX v4 white-label cryptocurrency exchange software stack on GitHub, designed to launch market-ready crypto exchange brokerage platforms with a built-in liquidity stream.
Join the Yellow Community and dive into the most product-oriented crypto project of this decade:
- Follow Yellow Twitter
- Join Yellow Telegram
- Check out Yellow Discord
- Read more exciting articles on Yellow Network Medium blog
- Find us on Hacker Noon
Stay tuned as Yellow Network unveils the development, technology, developer tools, crypto brokerage nodes software, and community liquidity mining!
